Introduction
Keeping your car looking pristine isn’t just about vanity; it’s a crucial part of vehicle maintenance that can extend the life of your paintwork. Car wax acts as a protective barrier, shielding your car from the elements and enhancing its shine. While commercial car waxes are widely available, many car enthusiasts and environmentalists are turning to homemade options. This blog will guide you through the benefits and process of creating your own car wax, using natural ingredients to achieve a showroom finish without harming the environment.
The Benefits of Homemade Car Wax
Homemade car wax offers multiple advantages over commercial products, making it an appealing choice for eco-conscious car lovers and DIY enthusiasts alike.
Environmental Benefits
Traditional car waxes often contain harmful chemicals that can be detrimental to the environment. By opting for homemade alternatives, you can use natural ingredients that are biodegradable and non-toxic. This not only reduces your carbon footprint but also ensures that you’re not contributing to water pollution when you wash your car.
Cost Savings
Commercial car waxes can be expensive, especially if you’re investing in high-quality brands. Creating your own wax is a cost-effective solution that allows you to achieve professional results without breaking the bank. Most of the ingredients required for homemade car wax are affordable and easily accessible.
Customization
One of the biggest perks of making your own car wax is the ability to customize it to your liking. Whether you prefer a particular scent or need a specific consistency, homemade wax gives you the freedom to experiment and find the perfect formula for your needs.
Essential Ingredients for Homemade Car Wax
Creating your own car wax doesn’t require a lab full of chemicals. In fact, you can make an effective and eco-friendly wax using a few simple ingredients.
Beeswax
Beeswax is a natural ingredient that’s perfect for car wax. It provides a durable layer of protection and gives your car a glossy finish. Beeswax is also hypoallergenic and biodegradable, making it an excellent choice for those concerned about the environment.
Coconut Oil
Coconut oil is another fantastic ingredient for homemade car wax. It’s known for its moisturizing properties, which can help keep your car’s paint looking fresh and vibrant. Additionally, coconut oil helps to repel water and prevent oxidation, extending the lifespan of your vehicle’s exterior.
Essential Oils
Adding essential oils to your homemade car wax can provide a pleasant scent and additional protective benefits. For example, lemon oil has natural cleaning properties, while lavender oil can offer a soothing aroma. Choose essential oils that align with your preferences and enjoy a personalized touch.
Step-by-Step Guide to Making Your Own Car Wax
Making homemade car wax is simpler than you might think. Follow these steps to create a batch of wax that will leave your car shining like new.
Step 1: Gather Your Ingredients
Start by assembling all the necessary ingredients, including beeswax, coconut oil, and your chosen essential oils. Make sure you have a double boiler or a heat-safe bowl and pot for melting the ingredients.
Step 2: Melt the Beeswax
Place the beeswax in the double boiler and heat it over medium heat until it melts completely. Stir occasionally to ensure even melting.
Step 3: Add Coconut Oil
Once the beeswax has melted, add the coconut oil to the mixture. Continue stirring until the coconut oil is fully incorporated and the mixture is smooth.
Step 4: Incorporate Essential Oils
Remove the mixture from heat and add a few drops of your chosen essential oils. Stir well to ensure the oils are evenly distributed throughout the wax.
Step 5: Cool and Solidify
Pour the mixture into a heat-safe container and allow it to cool and solidify. Once hardened, your homemade car wax is ready to use.
Pro Tips for Homemade Car Wax Application
Applying homemade car wax effectively requires some know-how. Here are expert tips to help you get the best results.
Choose the Right Conditions
For optimal application, choose a cool, shaded area to wax your car. Avoid direct sunlight, as it can cause the wax to dry too quickly and result in streaks or uneven coverage.
Prep the Surface
Before applying wax, thoroughly wash and dry your car to remove any dirt, grime, or old wax. A clean surface ensures that the wax adheres properly and provides maximum protection.
Apply in Small Sections
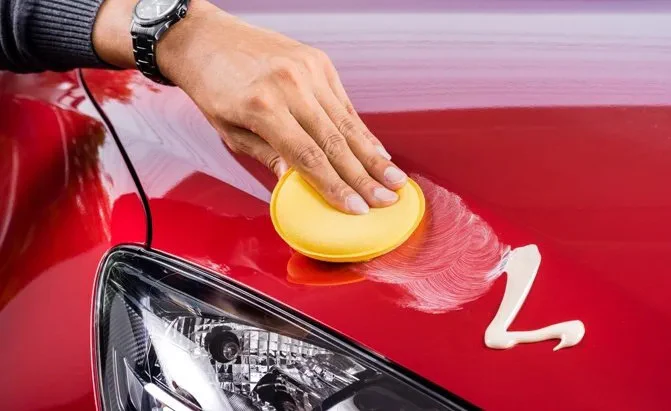
Work in small sections to ensure even application. Use a soft cloth or foam applicator to apply a thin layer of wax in circular motions. After applying, use a clean microfiber cloth to buff the wax to a glossy finish.
Conclusion
Creating your own car wax is an enjoyable and rewarding experience that offers numerous benefits. With natural ingredients like beeswax, coconut oil, and essential oils, you can achieve a professional-grade shine while being kind to the environment. We encourage you to try making your own car wax and share your experiences and tips in the comments below. Whether you’re a car enthusiast, an environmentalist, or a DIYer, homemade car wax is a fantastic way to maintain your vehicle and express your creativity.


